How To Configure Optimizely CMS 12 UIUserProvider and UIRoleProvider
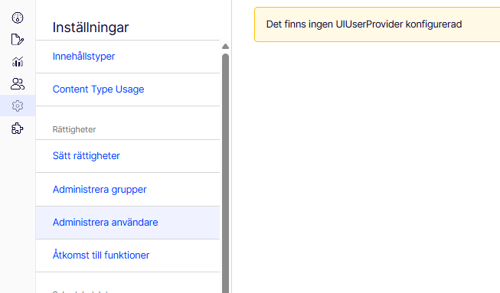
In this post I will share my experience in solving the "There is no UIUserProvider configured" you get in the Admin UI when you use your own authentication method.
When you are using the out of the box AspNetUser Identity authentication, everything is working fine.
But, we all know that Optimizely CMS 12 is incredibly flexible and have many possibilities, that's nothing new.
The problem that appears when you implement a custom authentication method with customers running their applications on-prem for various reasons, we encounter this warning text.
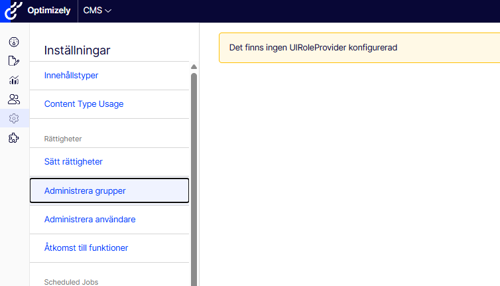
This message shows because Optimizely doesn't know where your users or roles are stored, therefore it tells you to extend the UIUserProvider interface to feed data into Optimizely.

This message also shows in the Admin UI when you want to list the groups/roles of your application.
It's not that big of a difference in how you get this to work compared to the UIUserProvider, the only difference is that the two interfaces needs different data.
I'll keep this short and show you how to get this working in no time!

Let's start, shall we?
We're starting with UIUserProvider.
Create a folder in your project and call it providers, feel free to call it something else if you want.
Inside the folder, create a file called CustomerUserProvider.cs.
Make sure DependencyInjection in your soloution is also configured correctly.
In this example I'm going to use ModuleDependency.
//some code here
namespace ExampleProject.Initialization
{
   [ModuleDependency(typeof(ServiceContainerInitialization))]
   public class DependencyInjection : IConfigurableModule
   {
     // some code here
     public void ConfigureContainer(ServiceConfigurationContext context)
     {
        // some code here
        context.Services.AddTransient<UIUserProvider, CustomUserProvider>();
        // some code here
     }
   }
}
Let's jump back to CustomerUserProvider.
Make sure your class inherits from UIUserProvider.
using EPiServer.Shell.Security;
// some using code here
namespace ExampleProject.Providers
{
  public class CustomUserProvider : UIUserProvider
  {
    // code will go here
  }
}
You're already close to having the foundation in place, we need to implement abstracted members that are inherited from UIUserProvider.
If you're using Visual Studio, CustomUserProvider will show you a hint, click on it and import what's needed.
You class should now look like this:
using EPiServer.Shell.Security;
// some using code here
namespace ExampleProject.Providers
{
  public class CustomUserProvider : UIUserProvider
  {
    public override bool Enabled => throw new NotImplementedException();
    public override string Name => throw new NotImplementedException();
    public override Task CountAsync(Expression> predicate = null, CancellationToken cancellationToken = default)

    {
       throw new NotImplementedException();
    }
  }
}
Let's write some magic shall we?
To keep this simple, I will write all the code related to CustomUserProvider inside CustomUserProvider.cs.
With that said, before we continue, we are going to create a new class under the CustomUserProvider.
In this example, we are showing the users that are created using your custom authentication method, and also show which authentication method they are created with to illustrate Optimizely CMS 12 capabilities.
I am assuming that all the data you need already exists in the database.
If you need help or have any questions about this, feel free to reach out to me on LinkedIn.
namespace ExampleProject.Providers
{
  public class CustomUserProvider : UIUserProvider
  {
    public override bool Enabled => throw new NotImplementedException();
    public override string Name => throw new NotImplementedException();
    public override Task CountAsync(Expression> predicate = null, CancellationToken cancellationToken = default)
    {
      Throw new NotImplementedException();
    }
  }

  // We add this one right here
  public class UIUserAccount : IUIUser
  {
    public string Username { get; set; }
    public string Email { get; set; }
    public bool IsApproved { get; set; }
    public bool IsLockedOut { get; set; }
    // You can leave this empty
    public string PasswordQuestion => string.Empty;
    public string ProviderName { get; set; };
    public string Comment { get; set; }
    public DateTime CreationDate => DateTime.Now;
    public DateTime? LastLoginDate { get; set; }
    public DateTime? LastLockoutDate { get; set; }

   }
}
Let's write some code into CountAsync method, and also create a new one called GetAllUsersAsync.
This solution can vary depending on how your database is configured and how you fetch your data.
Example:
namespace ExampleProject.Providers
{
  public class CustomUserProvider : UIUserProvider
  {
    public override bool Enabled => true;
    public override string Name => "CustomUserProvider";
    public override Task CountAsync(Expression> predicate = null, CancellationToken cancellationToken = default)
    {
      // fetch all users here
      var allUsersInDb = GetAllDbUsersHere;

      return Task.FromResult(bankIdUsersFromDb.Count());

    }

    public override async IAsyncEnumerable<IUIUser> GetAllUsersAsync(int pageIndex, int pageSize)
      {
         var getAllUsersInDb = GetAllDbUsersHere;

         foreach (var user in getAllUsersInDb)
         {
            yield return new UIUserAccount
            {
             // Assign values for each user here
             Username = user.Name,
             IsApproved = true,
             Comment = string.Empty,
             Email = user.Email,
             IsLockedOut = false,
             // I'll just write a string value for now
             ProviderName = "BankId User"
             };
         }
         await Task.CompletedTask;
  }
  // some code here
}
Build your solution and jump over to the admin UI, you should be able to see your users now.

Before we continue with the UIRoleProvider, let's walk through the code and make sure we understand what's happening here.
Counting the total users is pretty straight forward.
But what's going on with GetAllUsersAsync?
First we're fetching data from the database, if you've got any questions on how to fetch your data, feel free to reach out to me.
Now that we got all the users from the database, we need to iterate through all of them to assign values for the Admin UI.
If you only have one type of account, you can just whatever value you want on ProviderName.
However, if you have different types of accounts and want to show that in the Admin UI, you can create the logic you need and assign a dynamic value to the ProviderName.
This method also returns an IAsyncEnumerable<IUIUser> which is designed to produce items one by one.
It makes it possible for the Admin UI to consume users as they are produced, without waiting for the full list.
For this reason we use yield return.
Lazy iteration is useful for working with large data sets or when data becomes available over time, like from a database or API.
Congrats, you have now successfully configured the Admin UI to show Users from your custom authentication method!
Let's jump over to CustomRoleProvider to do the same thing.
Create a file CustomRoleProvider.cs in the Providers folder.
Make sure to inherit from UIRoleProvider as following example:
    public class CustomRoleProvider : UIRoleProvider
    {
        public override bool Enabled { get => throw new NotImplementedException(); set => throw new NotImplementedException(); }

        public override string Name => throw new NotImplementedException();

        public override IAsyncEnumerable GetAllRolesAsync()
        {
            throw new NotImplementedException();
        }
    }
Let's not forget about DependencyInjection.
//some code here
namespace ExampleProject.Initialization
{
  [ModuleDependency(typeof(ServiceContainerInitialization))]
  public class DependencyInjection : IConfigurableModule
  {
    // some code here
    public void ConfigureContainer(ServiceConfigurationContext context)
    {
      // some code here
      context.Services.AddTransient<UIRoleProvider, CustomRoleProvider>();
      context.Services.AddTransient<UIUserProvider, CustomUserProvider>();
      // some code here
    }
  }
}
Now we can do the same thing we did with the users.
We can also use the build in RoleManger.
namespace ExampleProject.Providers
{
  public class CustomRoleProvider : UIUserProvider
  {
    private readonly RoleManager<IdentityRole> _roleManager;
    public CustomRoleProvider(RoleManager<IdentityRole> roleManager)
      {
         _roleManager = roleManager;
      }

      public override bool Enabled { get => throw new NotImplementedException(); set => throw new NotImplementedException(); }
      public override string Name => "CustomProvider";
      public override async IAsyncEnumerable<IUIRole> GetAllRolesAsync(int pageIndex, int pageSize)
      {
         var getAllRolesInDb = await _roleManager.Roles.ToListAsync();

         foreach (var role in getAllRolesInDb)
         {
            yield return new UICmsRole
            {
              name = role.Name,
              ProviderName = string.empty
            };
         }
         await Task.CompletedTask;
  }

  public class UICmsRole : IUIRole
  {
    public string Name { get; set; }
    public string ProviderName { get; set; }
  }

  // some code here
}
Congrats, you've now successfully configured the Admin UI to show roles.
You can also extend this by also showing users and roles from the database tables tblSynchedUser and tblSynchedUserRole.
It all depends on how your solution is working and where you are storing your data.
Pretty simple, right?